Building a RaspberryPi bioinformatic cluster.
Why am I building a RaspberryPi cluster?
SBCs (single board computers) aren’t good for all analyses; they have relatively little memory and are much slower than contemporary workstation CPUs. However, they can do simple calculations quickly and with their low cost, you could potentially parallelize some jobs quite efficiently in this framework (fitting many possible models to a single dataset, performing a great many iterative simulations, etc.). Furthermore, having a cluster in our lab provides my students with the opportunity to experiment with cluster computing in a way that is difficult when using a university administered HPC. Plus I’m stuck at home a lot during COVID-19 and I thought it would be fun to learn a bit more about cluster computing first hand.
What supplies am I using to do this?
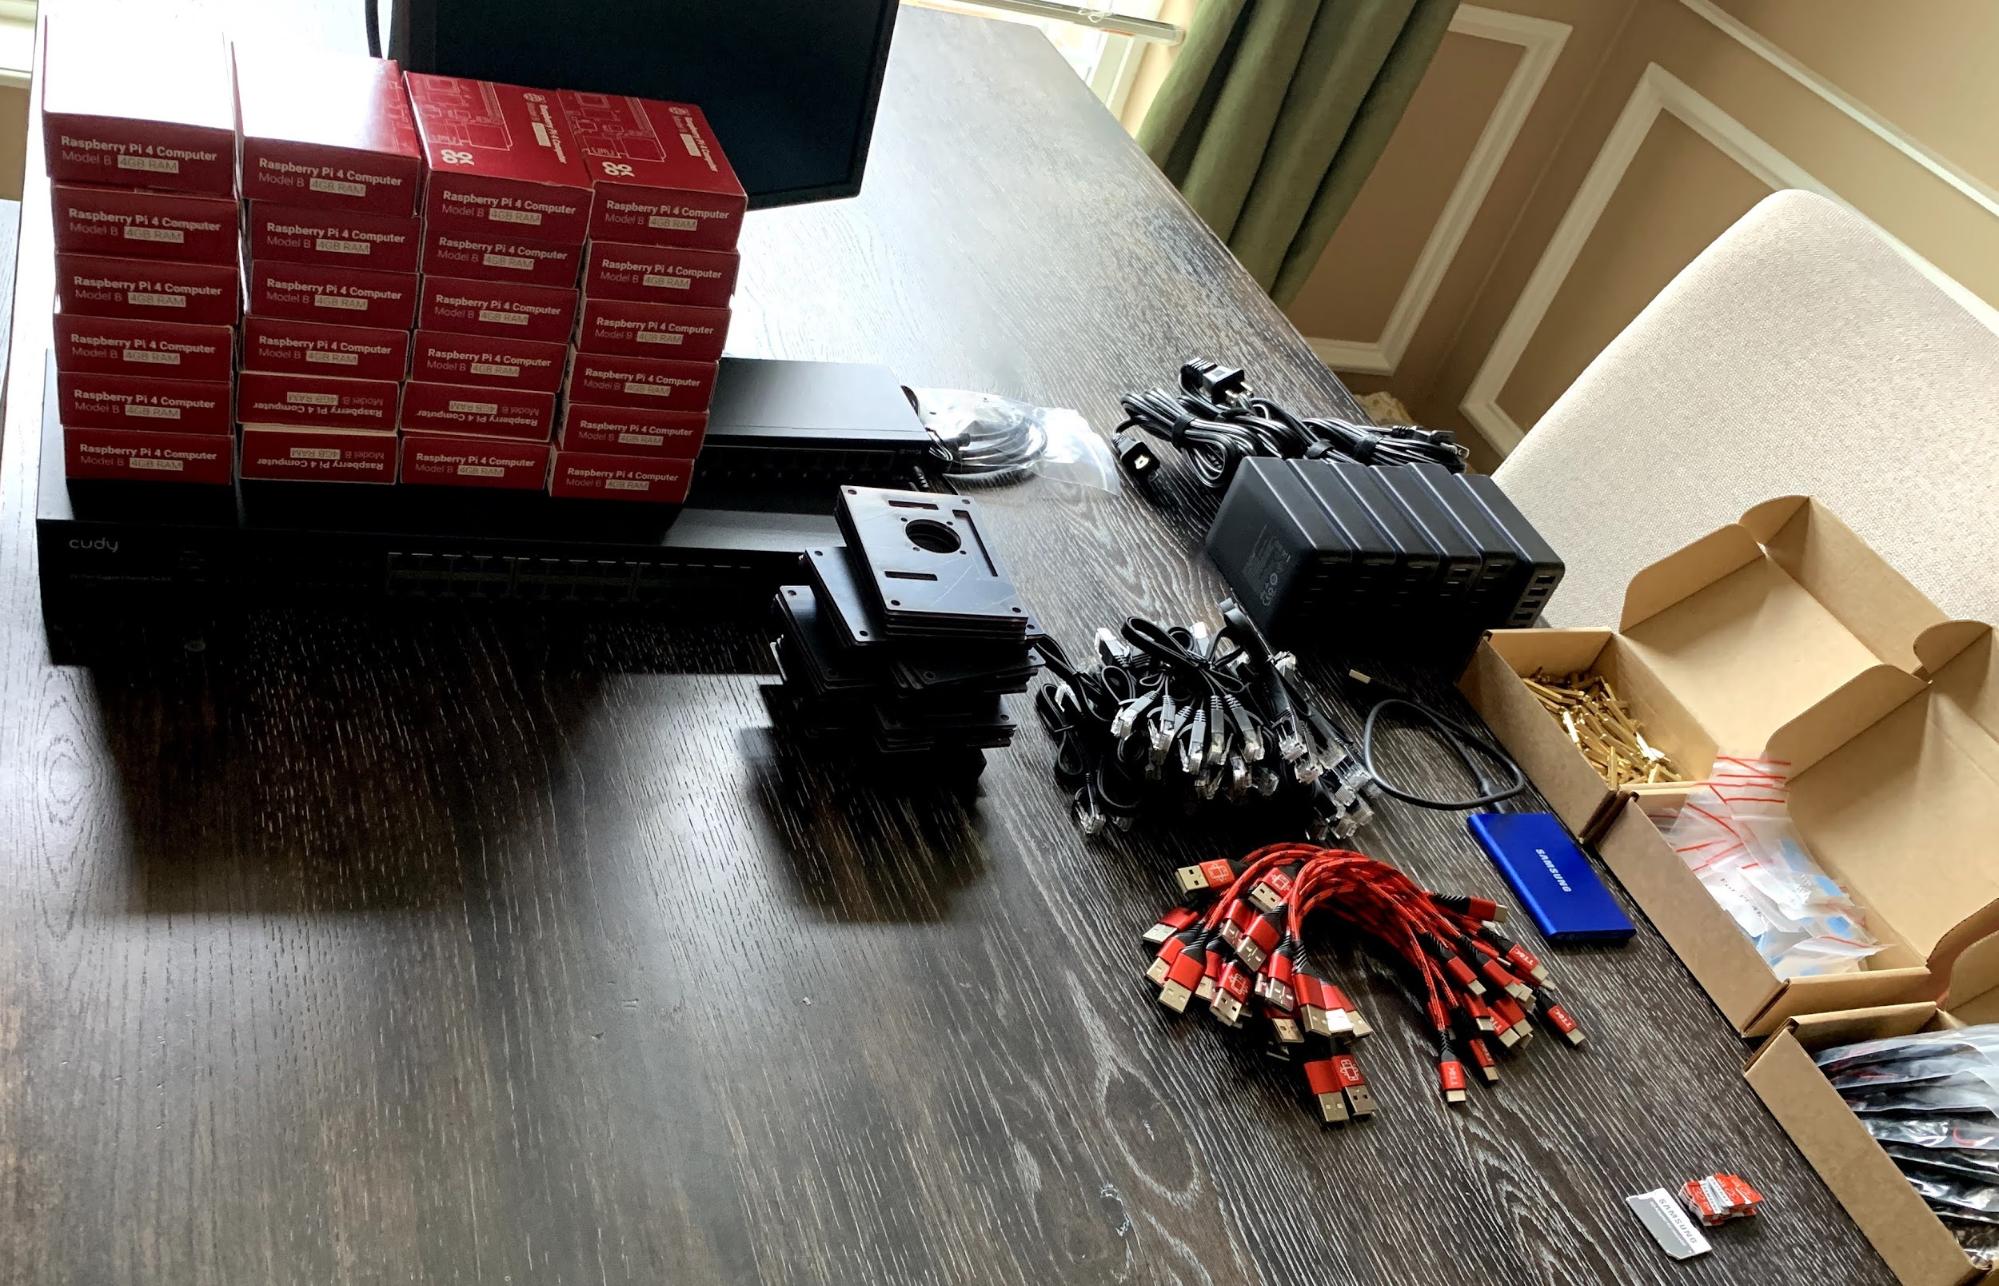
I ordered almost everything off of Amazon I’m sure if you shopped around or repurposed equipment you could shave some off of what I spent.
Quantity | Description | Link | Unit Cost | Total |
25 | Raspberry Pi 4 B with 4 GB RAM | $55.00 | $1,375.00 | |
1 | RSB Pi 4 B with 8 GB RAM | $89.95 | $89.95 | |
5 | Rack and fan setups | $25.00 | $125.00 | |
6 | Micro SD 32 GB 5-pack | $33.00 | $198.00 | |
1 | 24-port Gigabit Ethernet switch | $65.90 | $65.90 | |
5 | CAT6 cables 1 foot 6-pack | $12.99 | $64.95 | |
8 | USB-C power cords 8" 3-pack | $8.99 | $71.92 | |
6 | USB 60 Watt charging stations 6-socket | $25.99 | $155.94 | |
Total Cost: | $2146.66 |
Not included in this cost are four items that I already had on hand and am “donating” to this project: a 1TB SSD external hard drive, monitor, keyboard, mouse, 8-port Gigabit Ethernet switch, and a couple of misc cables that I already had on hand. You might notice that I purchased six 6-port chargers for power (36 total ports for a system with 26 Pis). After a lot of reading, I had some concern that these packs might not provide enough power if they were running 6 Pis (especially if you have several USB devices plugged into the Pis). To alleviate this concern most of the power packs only run 4 Pis each.
With this setup, I will have 104 cores (26 - quadcore processors) with 108 GB of RAM.
Before going through what I did I should point out that there are some great tutorials already out there that made this project possible. Much what is below is an amalgamation of what is available in these two:
Build a Raspberry Pi Cluster - from MagPi magazine
Five years of Raspberry Pi clusters
Part 1 Physical assembly
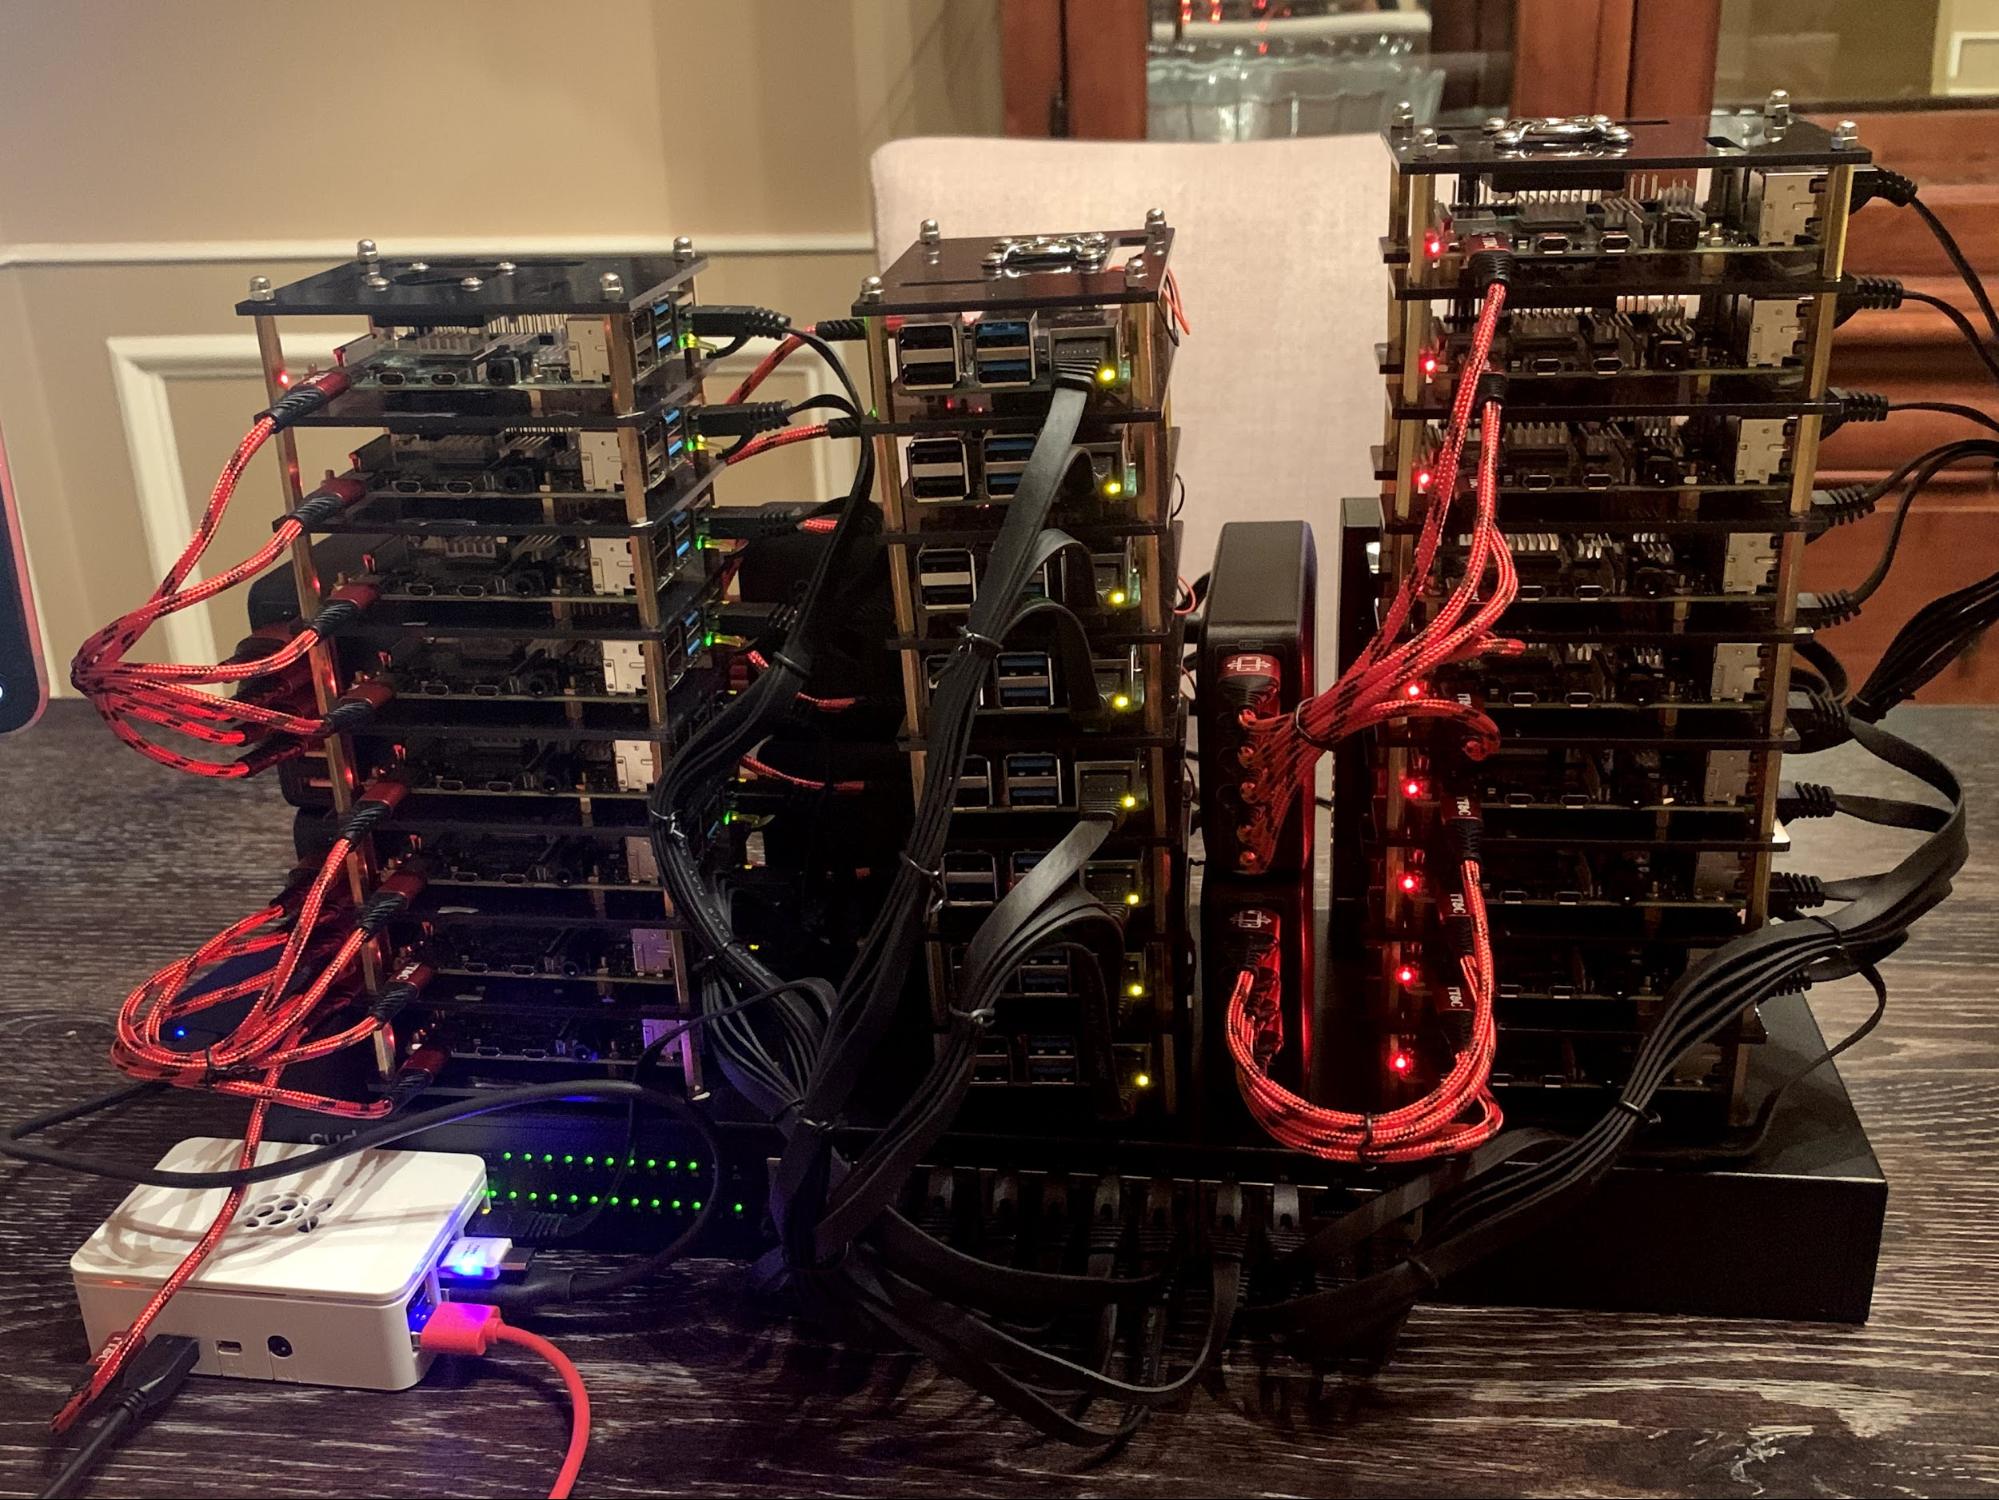
Assembling the Pi racks was all quite straightforward. I first assembled all of the heatsinks on every pi and attached the fans to each plate that would later hold a Pi. I combined the pie racks that are designed for five Pis each into three towers two holding eight each and one holding nine. With fans and heat sinks attached it was a pretty straightforward process to mount each Pi on its standoffs and then begin stacking the plates in each tower and connecting the fans to the pins on the Pi below each plate.
For now my head node is just another Raspberry Pi 4 (8GB ram version). I am housing this in a standard raspberry Pi case that came with a kit that I had bought in the past. I did this because I imagine that later I might replace this with a small Linux machine from system 76 that would have a bit more robust capabilities. At this point everything but cabling, disks, and software was complete.
Part 2 Operating system choice and installation
I’ll be honest here. I’m not sure what the best decision is at this point. For my first attempt, I installed the 64-bit Ubuntu server OS version 20.04. With the LUBUNTU desktop environment. However, I found that this had pretty high RAM usage. I decided to try using the standard 32-bit Rasbian operating system (Buster) this operating system is based on Debian version 10 and is designed specifically around the Pi. When I did a test install of this operating system I found that I liked its interface and that it was quite responsive. A bit of a digression but if USB booting becomes a well-supported feature (it was broken in a recent update) I could easily see myself putting a couple of Raspberry Pis in the lab for people to use at certain lab stations where data entry or specimen tracking is common - replacing the typical solution of people using their laptops.
The approach that I took was to install Rasbbian Buster on the head node and do all the system updates and then get R version 4.0.2 compiled from source. This process took a little longer than I might have hoped, but I followed the installation instructions that come with the R source code and eventually most everything worked like a charm. When I tried to run the R configure file initially it would error out and report some library that I lacked. In every case figuring out how to install these packages on the Pi was just a matter of a quick google. Just try a search like “how to install libXXX on raspberry pi” almost always one of the first two hits will be what you are looking for. When this configure script finally runs successfully then you are ready to run make, and install. I did run into one problem here which I eventually chose to leave unresolved: I was unable to make the pdf man pages. I kept getting a failure saying that texi2any needed to be version >5.1. However, it is 6.5 and this was causing make install-pdf to fail. However, make and install worked fine and R was up and running. After this I was ready to get all the R packages up and running, this was just about like compiling R; I ran into many missing libraries. Again googling solved the problem. Finally, I was ready to install MPI which provides the message passing protocols required for splitting jobs up among a number of machines. For this step I chose to install openMPI using the following code:
sudo apt install openmpi-bin openmpi-common libopenmpi3 libopenmpi-dev -y
With that done I then used the SD card clone program that comes with Rasbian Buster to make 25 clones of this SD card. This isn’t quick 20 minutes or so for each card.
If you want to set up all of your nodes headless via ssh you would need to add an empty file named ssh to the boot folder of the SD card prior to putting in your Pi and starting it up (by default SSH is not enabled in Rasbian). I did not do this because I actually plugged my monitor into each pi as I booted each one for the first time.
When this was done I then put the cards in all the Pis and powered on the racks. This was a mistake! It ends up that if the Pi doesn’t detect an HDMI cable it doesn’t start X11 (the windowing system) so no output when you do plug in a monitor. This combined with one Pi that had a damaged HDMI port led to a full day of me troubleshooting (and ruining two micro-HDMI connectors) when nothing was actually wrong!!! It ends up all the Pis were running fine, they just weren’t sending anything out to the HDMI since it wasn’t there on boot. Once I figured out what was happening I then began powering on one Pi at a time with my HDMI cable connected.
*we name all of our computers after great scientists and we christened this one stevens after Nettie Stevens. Dr. Stevens was a pioneering woman in science who wrote two amazing books called Studies in Spermatogenesis I and II. These books were written in 1905 and 1906 and are well worth a read for anyone who is interested in sex chromosomes.
sudo nano /etc/dhcpcd.conf
interface eth0
static ip_address=10.0.0.1/24
sudo systemctl enable ssh
sudo systemctl start ssh
sudo service ssh status
ssh-keygen -t rsa
This is going to ask you 3-4 questions you can just hit enter each time till it is done. It will work best if you have done this setup on the head node first.
ssh-copy-id 10.0.0.1
Except for replace “10.0.0.1” with the static IP address that you assigned to your head node.
ssh-copy-id 10.0.0.2
You need to do this for every node you set up so in my case I ran the ssh-copy-id with every IP address from 10.0.0.2 to 10.0.0.26
ssh 10.0.0.4
At this point I was ready to finalize all my cabling, and if I could do anything over I would have gotten slightly longer cables. I was able to make everything work but with the setup that I got there is no extra slack for some of the longest cable stretches and it constrains how I can organize everything.
Part 4 Test Run
Coming Soon